


{my ikea diy: dorothy draper style!} (from marcusdesigninc.blogspot.com)
If you are following my blog you may have noticed that I am not the biggest 'DIYer' - I wish I was but I am often the type to start a project and not 'quite' finish it, or I have too many ideas in my head that so few of them actually come to fruition. Well this time around I finally put the pedal to the metal and finished a project that I am quite excited to share with you! Here's how I took this plain jane IKEA Rast dresser from drab to fab, in trueDorothy Draper form!
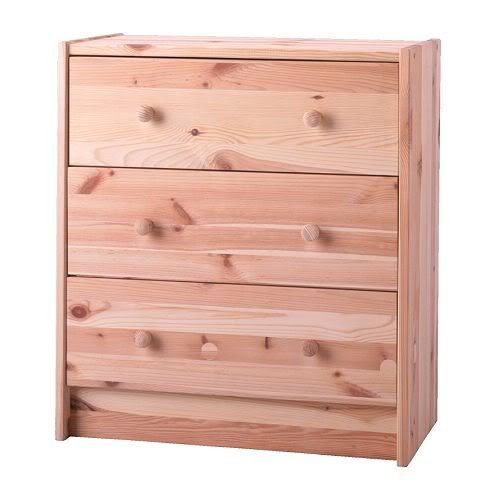
So I started out with a couple of these ....
So I started out with a couple of these ....
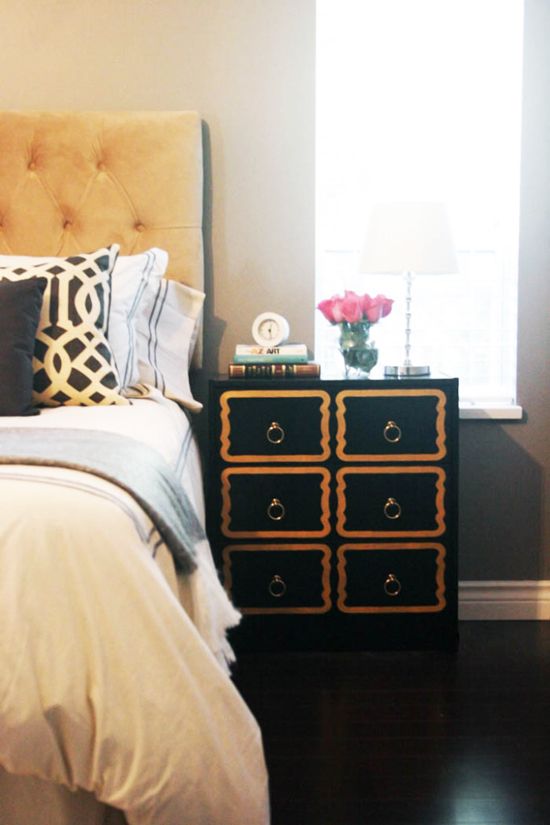
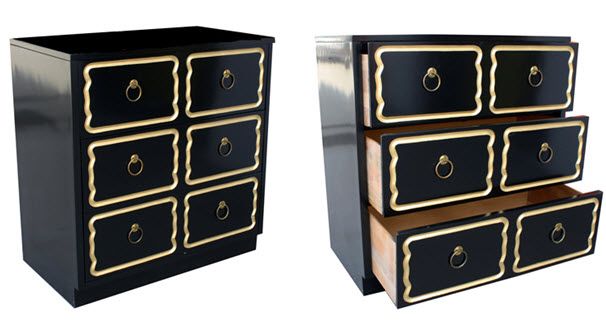
And turned them into this!


How I got the Dorothy Draper inspired look:
1) I bought 2 Rast dressers from IKEA, and assembled the tables, except for the drawers.
2) I primed the 'body' of the dresser {assembled} and the fronts of the doors and then sprayed them using RustOleum's black lacquer spray {Tip, I would buy the attachment for spray paint cans to make spraying evenly much easier...oh, and wear a mask and spray in a well-ventilated area!}. I did 2 coats to get good coverage.
3) I took inspiration pics from Dorothy Draper chests online, and blew them up to be able to draw the shape of the inlay on a piece of transparent paper that I cut to be the same size as each drawer. Here is where the measure-twice-cut-once rule really applies! To be truthful, this is where my Dad's engineering skills came in handy, thanks Dad! We cut the stencil using an art Xacto knife, leaving gaps so that the centre of the stencil stayed attached to the outside. We secured the stencil onto the drawer using painter's tape.
4) Using Liquidtex's Iridescent Rich Gold heavy body acrylic paint, we carefully painted on the design. I removed the stencil after allowing the paint to dry for about 1 hour. I taped off the gaps that remained (due to the stencil) and filled those in. I let this dry over night and then went over the gold free-hand to make it even thicker afterwards.
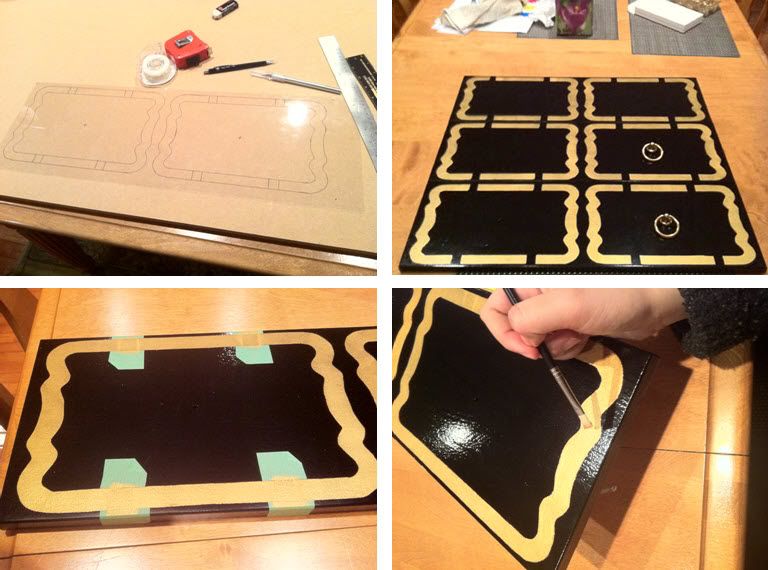
5) I then put the drawers together on the built shelf, and put in some beautiful bronze ring pulls from Lee Valley Tools. Confession: I still have to coat these babies in a glossy varathane to protect them (on the to-do list!).
Source guide:
Ring pulls: Lee Valley (size: 51mm x 43mm- $2.40 x 12)
Ring pulls: Lee Valley (size: 51mm x 43mm- $2.40 x 12)
Side Tables: Ikea Rast Table ($29.99 each)
Black Paint: RustOleum's Black Lacquer spray ($5.99 per can x 4)
Transparent Stencil paper: Opus Arts ($1.80)
Gold Paint: Liquidtex Iridescent Rich Gold - Opus Arts ($6.60)
Xacto knife: Opus Arts ($3.49)

So the total cost for 2 fabulous, Dorothy Draper Espana Bunching-inspired bedside tables ... drum-roll please!!

Just under 125 dollars! Not bad right? Especially since I know I'm not able to afford a real-deal DD piece anytime soon ... some of these well restored fabulous dressers can run you up to $4000 each! And yes, I know that some people have found them in antique stores for around 20 dollars in the States, but I can't even imagine finding anything like that here in Vancouver
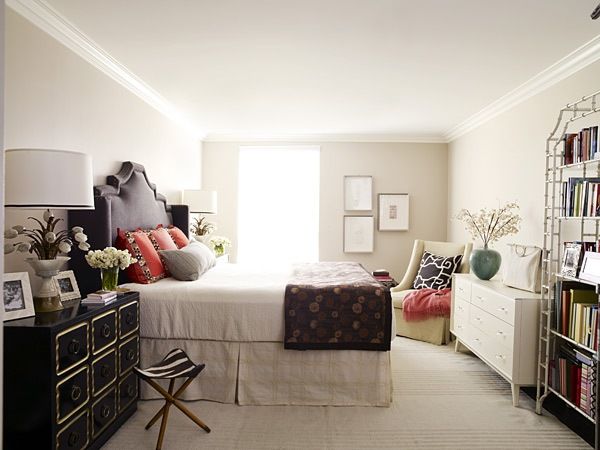
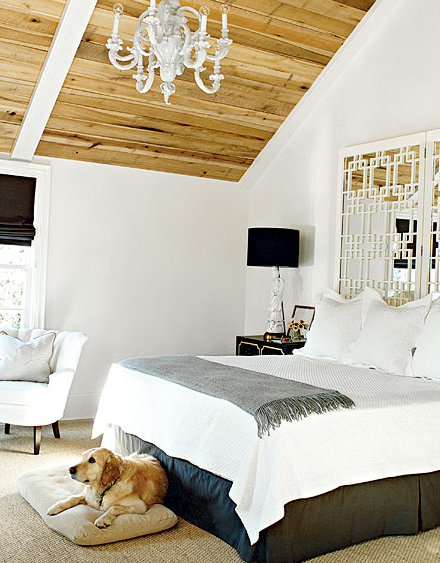
Here are a few images that I gained inspiration from for my tables:
Here are a few images that I gained inspiration from for my tables:


I am right there with ya! I am a half ass DIY'r I have so many unfinished projects. So kuddos to you for sticking with it.It looks awesome! I am @ http://seasidestyle.blogspot.com
ReplyDeleteThanks for the comment Seaside! I am going to check out your blog right now...
ReplyDelete