
In many homes, the bedroom often gets the least decorative attention even though it's the room where we normally spend the most time. And it's no wonder, bedroom furnishings aren't easy on the wallet. However, if you start with the headboard wall — the focus of the room — and go from there, it's easy to establish a vision and get the creative ideas flowing.


• Gallery Wall. I know there is a hot debate about the safety of using shipping pallets as furniture, so let's not even go there today, but I will say that creating a gallery wall around a simple bed frame — even one with no headboard at all — creates an instant focal point. Pick objects that can be affixed securely to the wall, and if you're in the earthquake zone, skip the suggestion entirely. Make sure that your hanging art is hung high enough that sitting up in bed won't cause an avalanche.
• Painted Headboard. You can be as elaborate (picture 3) or as minimalist as you'd like, but defining your sleep-space with a drawn or painted headboard is the most cost effective way to anchor your bed, especially one lacking in an ornamentation.
• Fabric Headboard. There are several ways to spruce up a bed with fabric, some being more costly and labor intense than others — think queen canopy — but simply hanging a tapestry or yard of fabric behind the bed will anchor the space and give it an instantly "finished" look. Use regular curtain rods or simple dowels and eye-hooks to affix them to the wall, and be creative about where you find your fabric — think table clothes, twin flat sheets, etc.
• Wallpaper and Decal Headboard. The decal craze may have lost some steam in the last few years, but it's still a great alternative for renters, dorm dwellers, or anyone seeking to spruce up a plain-jane frame without breaking the bank. Check out Blik anduppercase living for some great headboard decals, or follow Martha Stewart's instructionsfor creating your own out of wallpaper.
Images&Content: "Ideas&Opintion" apartmenttherap Images: 1: Serena & Lily, 2: via decorpad, 3: Apartment Therapy: Chicago, 4: Homes and Gardens, 5: Southern Accents, 6: Martha Stewart, 7: uppercase living
Cool ideas right? Well... Here is a How to:
All Pics and words by Metelandmud

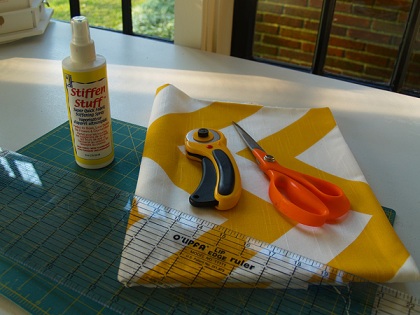
For this project I used:
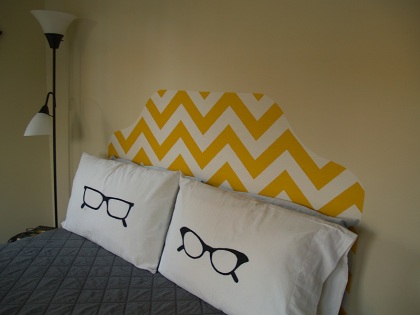
- 1 yard of good quality decorator fabric, which I bought at Premier Fabrics in Germantown. I chose Zig Zagin Corn Yellow.
- Stiffen Stuff
- Good fabric scissors
- An iron
- 1 yard of good quality decorator fabric, which I bought at Premier Fabrics in Germantown. I chose Zig Zagin Corn Yellow.
- Stiffen Stuff
- Good fabric scissors
- An iron
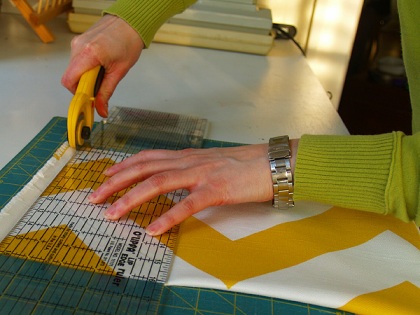
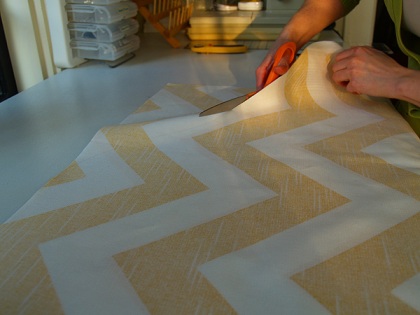
Step 1: Cut the selvedge off and square up the fabric. If you have a queen bed, you’re going to want to keep as much of the width as possible, so be sure to cut close to the edge of the selvedge.
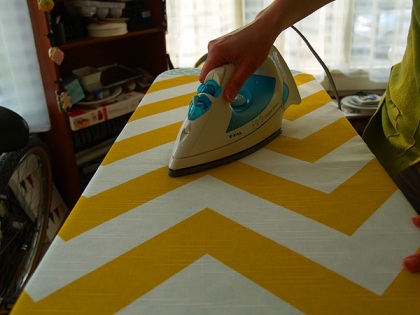
Step 2: Iron that puppy to within an inch of its life. Once you start spraying you’re not going to be able to iron it again, so you want to get it as flat as possible now.
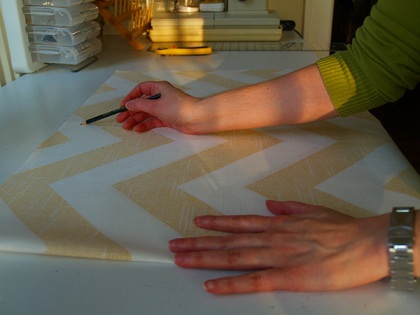
Step 3: Fold the fabric in half lengthwise and sketch on the shape of your headboard. Since my fabric is so angular, I decided I wanted the shape to be really fluid and curvy.
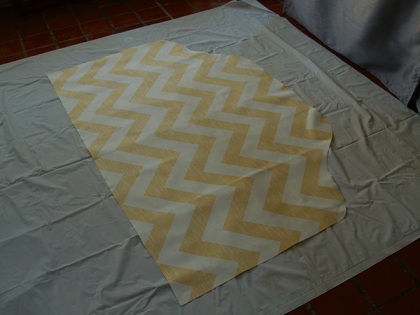
Step 4: Cut out your headboard.
Step 5: Lay your headboard, face down, on a flat surface, with a tarp under it to keep your floor or table from getting sticky (I use a shower curtain liner from the $1 store… way cheaper than an actual tarp). I planned on spraying the entire back, but within a few minutes, my fingers were cramping and the spray bottle started sticking. So instead, I opened the bottle, poured a little into a bowl (one I didn’t mind never eating out of again), and brushed it on with an old paintbrush. Try to get at least a little glue on every inch of the fabric, but be SURE to REALLY SOAK the edges. Let it dry overnight.
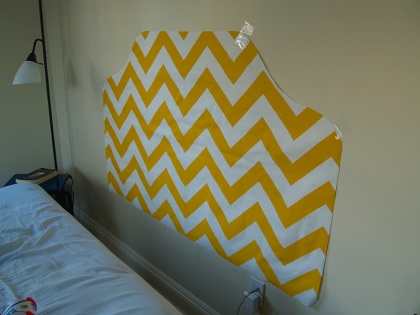
Step 6: Once your headboard is completely dry, it’s time to place it on the wall. You can use packing or masking tape to temporarily hold it up. Make sure it’s straight before you start ironing!
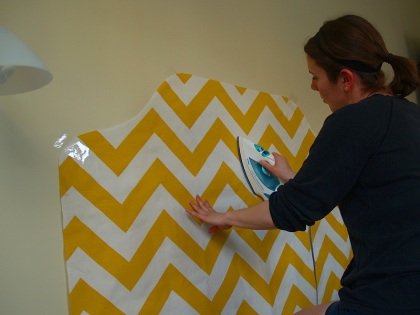
Step 7: Set your iron to high heat with no steam. I started in the middle, ironing the middle section from top to bottom, then working my way out. Be sure to focus on the outer edge, making sure it is firmly attached all the way around.
And you’re done! I’m really happy with how this project turned out. It really brings life into my bedroom, which has felt pretty lifeless since I moved in. And the best part is that it cost about $9, didn’t take much time, and is completely reversible if I get sick of it!




No comments:
Post a Comment